前言
这个文章我整理了好久,应该是目前(202404)最全的新版DPG教程了,希望大家喜欢。
这份教程偏向新手入门和初级使用。官方文档有点不说人话,demo倒是不错,但是对于绝对的初学者也是没法上手。这份教程就是介于这些难度中间的一个级别。提供大量代码例子方便copy。
DPG作为python gui名气不是很大,样子也和常见的GUI有些差别(我最开始觉得这个是搞游戏里面gui的,而不是传统的窗体,但是当作传统窗体写一点没有问题),习惯之后会感觉很好用,而且功能也很强大(比较厉害的图表功能这个教程都没涉及)。全平台兼容性也不错。
而且重点是 DPG 比较好看.. tkinter 真的是太丑了..
下面放一些学习链接,供大家参考:
- doc https://www.osgeo.cn/dearpygui/tutorials/first-steps.html
- pypi https://pypi.org/project/dearpygui/
- github https://github.com/hoffstadt/DearPyGui/
- ===
- 简书某人教程 https://www.jianshu.com/u/ef1f22e315:2215:22bda9
- 某yt视频教程 https://www.youtube.com/watch?list=PLeOtHc_su2eVsj4QylvXYcyQsGu1Bwgp9
安装
pip install dearpygui
Demo
DPG 这玩意没有书或者好的视频,就只有文档,还有示例代码 示例代码可通过下列函数启动 show_demo 中包含了所有官方代码示例,可以看看!包括很多本教程中未提到的控件。 建议先看本教程,然后基础了解了之后就可以翻阅demo来看(抄)自己想要的效果和控件了。
import dearpygui.dearpygui as dpg
import dearpygui.demo as demo

dpg.create_context()
dpg.create_viewport(title='Custom Title', width=600, height=600)

demo.show_demo()

dpg.setup_dearpygui()
dpg.show_viewport()
dpg.start_dearpygui()
dpg.destroy_context()
基础模板
了解一下套话 精简版
import dearpygui.dearpygui as dpg

dpg.create_context()
dpg.create_viewport(title="title", width=700, height=700)

with dpg.window(label='inner title', width=400, height=400,pos=(20, 20)):
    dpg.add_text(default_value='Hello World')

dpg.setup_dearpygui()
dpg.show_viewport()
dpg.start_dearpygui()
dpg.destroy_context()
注释版:
import dearpygui.dearpygui as dpg

# 创建环境。这句是套话
dpg.create_context()

# 创建视窗。套话,可以修改窗体title,宽度和高度
dpg.create_viewport(title="test", width=700, height=700)

# 创建窗体。套话,具体如下:
# label 窗体标签,就是子窗体上显示的标签
# width, height 窗体的宽度和高度
# pos 窗体在视窗(viewport)中出现的位置。
with dpg.window(label='test_dearpygui_hello_world', width=400, height=400,
                pos=(20, 20)):
    # 增加一个文本控件(组件,想叫啥名自己选),用来显示文本
    # default_value 文本的初始字符串
    dpg.add_text(default_value='Hello World')

# 下面的都是套话,包含程序生命周期和inf loop函数
dpg.setup_dearpygui()
dpg.show_viewport()
dpg.start_dearpygui()
dpg.destroy_context()
常用组件
text
- 一个纯展示用的文本控件
- default_value 文本内容
- tag 唯一标识符
dpg.add_text(default_value='Hello World' , tag='text1')
button
- 一个可以点击的按钮
- label 文本内容
- callback 事件函数 , 点击按钮时触发
- 函数声明
def btnclick():要写在创建bth之前
dpg.add_button(label='Gbtn' , callback=btnclick)
input
- 一个输入框
- hint 提示文字
- get_value 函数,通过tag获取输入框的值
dpg.add_input_text(tag = 'Username_input' , hint='输入你的用户名')
dpg.get_value('Username_input')
image
这里用了一个网上抄到的函数
- 图像框
- image_path 图片路径
- parent 父元素
- scale 缩放比 , 1 = 不缩放,原图大小
def add_and_load_image(image_path, parent=None , scale=0.4):
    width, height, channels, data = dpg.load_image(image_path)

    with dpg.texture_registry() as reg_id:
        texture_id = dpg.add_static_texture(width, height, data, parent=reg_id)

    if parent is None:
        return dpg.add_image(texture_id,width=width*scale, height=height*scale)
    else:
        return dpg.add_image(texture_id, parent=parent , width=width*scale, height=height*scale)
popup 内部弹窗
with dpg.window(label="popup", width=500, height=500):
    dpg.add_button(label="Left Click...")
    with dpg.popup(dpg.last_item(), modal=True, mousebutton=dpg.mvMouseButton_Left, tag="__demo_popup3"):
        dpg.add_text("All those beautiful files will be deleted.\nThis operation cannot be undone!")
        dpg.add_separator()
        dpg.add_checkbox(label="Don't ask me next time")
        with dpg.group(horizontal=True):
            dpg.add_button(label="OK", width=75, callback=lambda: dpg.configure_item("__demo_popup3", show=False))
            dpg.add_button(label="Cancel", width=75, callback=lambda: dpg.configure_item("__demo_popup3", show=False))

messagebox 系统提示窗
messagebox.showinfo("title","hey, alert!") #蓝色气泡叹号
messagebox.showwarning('a','aaa') #黄色三角叹号
messagebox.showerror("title","error info") #红色叹号
超链接按钮 hyperlink
抄袭官方demo,_hyperlink 函数
import dearpygui.dearpygui as dpg
import webbrowser #导入webbrowser模块才能打开超链接

#定义超链接组件
def _hyperlink(text, address):
    b = dpg.add_button(label=text, callback=lambda:webbrowser.open(address))
    dpg.bind_item_theme(b, "__demo_hyperlinkTheme")

dpg.create_context()
dpg.create_viewport(title="DearPyGui_test", width=700, height=700)
with dpg.window():
    #使用超链接组件
    _hyperlink('baidu', 'https://www.baidu.com')


dpg.setup_dearpygui()
dpg.show_viewport()
dpg.start_dearpygui()
dpg.destroy_context()
table展示字典
table布局在下面布局部分有提到,可以用作布局网格。
这里讲一下如何展示数据(字典):
下面例子中,我创建了一个函数 _create_dict_table 并且接受如 your_data 这样的字典数据。
(pandas 也接受 your_data 这样的字典数据)
这个函数应该是可以复用的。
dpg.table参数介绍:
- borders_outerH/V 外边是否显示网格线
- row_background 交替背景颜色
- resizable 列宽度可以用鼠标调整
- height=100,scrollY=True 通常一起使用,height限制总高度 , scrollY则在超出高度时候允许滚动
import dearpygui.dearpygui as dpg

# 您自己定义的字典数据
your_data = {
    "Name": ["Alice", "Bob", "Charlie"],
    "Age": [25, 30, 35],
    "Occupation": ["Engineer", "Artist", "Doctor"]
}
# 通过形如上面的字典数据,创建表格
def _create_dict_table(dict_data):
    with dpg.table(borders_outerV=True,borders_outerH=True,
                row_background=True,resizable=True): #height=100,scrollY=True
        # 添加表头
        row_count= 0
        for key in dict_data.keys():
            dpg.add_table_column(label=key, width_stretch=True)
            row_count = len(dict_data[key])
        # 添加数据
        for i in range(row_count):
            with dpg.table_row():
                row_list = [dict_data[key][i] for key in dict_data.keys()]
                for item in row_list:
                    dpg.add_text(item)

dpg.create_context()
# 创建GUI窗口
dpg.create_viewport(title="DearPyGui_test", width=700, height=700)
with dpg.window(label="table_dict", width=500, height=500):
    _create_dict_table(your_data)

dpg.setup_dearpygui()
dpg.show_viewport()
dpg.start_dearpygui()
dpg.destroy_context()

分隔符号
dpg.add_spacing(count=5) #增加五行空行
dpg.add_separator() # 增加一条分割线
same line
组件默认是一行一个的,如果想要一行显示两个可以用这种方式
dpg.add_a;dpg.add_same_line()
dpg.add_b
修改组件属性
修改text 文字、颜色
dpg.set_value('text1','new string')
dpg.configure_item('text1', color=(0,0,255))
获取文字
dpg.get_value(item='text1')
布局
menubar 菜单栏
菜单栏就是窗口顶部第一排的位置,通常有 文件 、 编辑 、设置 …
dpg.create_viewport(title="DearPyGui_test", width=700, height=700)
with dpg.window():
    with dpg.menu_bar():
        with dpg.menu(label="Menu"):
            dpg.add_menu_item(label="New",
	            callback=lambda:messagebox.showinfo("title","hey, you click new!") )
            dpg.add_menu_item(label="Open")
            dpg.add_menu_item(label="item3")
group与水平布局
可以在一个window中增加多个group来实现布局。
一个 dpg.group 相当于一个盒子
组件默认的是竖向排列放置的(从上往下),可以设置horizontal=True实现水平排版
- horizontal = true 水平
- width 限制group宽度
with dpg.window(label='Test', width=1260, height=480):
    with dpg.group(horizontal=True):
        dpg.add_input_text(hint='(input_text)', width=200)
        dpg.add_button(label='(button)',width=200)
        dpg.add_radio_button(items=['(radio_button1)', '(radio_button2)', '(radio_button3)'])
Table 布局
另外还可以使用table布局
- header_row 标头行是否显示
- borders_xxx 显示网格线
- row_background 交替颜色背景
with dpg.window(label='window1', width=300, height=300, pos=(20, 20), tag='win1'):
    with dpg.table(tag='layout_demo_table', header_row=False, borders_innerH=True, borders_outerH=True, borders_innerV=True, borders_outerV=True):
		#三个列
        dpg.add_table_column()
        dpg.add_table_column()
        dpg.add_table_column()
		# 第一行 三个按钮
        with dpg.table_row():
            dpg.add_button(label="Button 1")
            dpg.add_button(label="Button 2")
            dpg.add_button(label="Button 3")
        # 第二行 一个空,两个按钮
        with dpg.table_row():
            dpg.add_table_cell()
            dpg.add_button(label="Button 4")
            dpg.add_button(label="Button 5")

with dpg.window(label='window1', width=300, height=300, pos=(20, 20), tag='win1'):
    with dpg.table(tag='layout_demo_table', row_background=True):

        dpg.add_table_column(label="car")
        dpg.add_table_column(label="name")
        dpg.add_table_column(label="sex")

        with dpg.table_row():
            dpg.add_text("tesla")
            dpg.add_text("ramona")
            dpg.add_text("female")

        with dpg.table_row():
            dpg.add_text("audi")
            dpg.add_text("jason")
            dpg.add_text("male")

        with dpg.table_row():
            dpg.add_text("bmw")
            dpg.add_text("lily")
            dpg.add_text("female")

Tree 树状布局
可以轻松实现多层树状标签
- collapsing_header 根级别
- tree_node 子节点级别(可叠加)
dpg.create_viewport(title="DearPyGui_test", width=700, height=700)
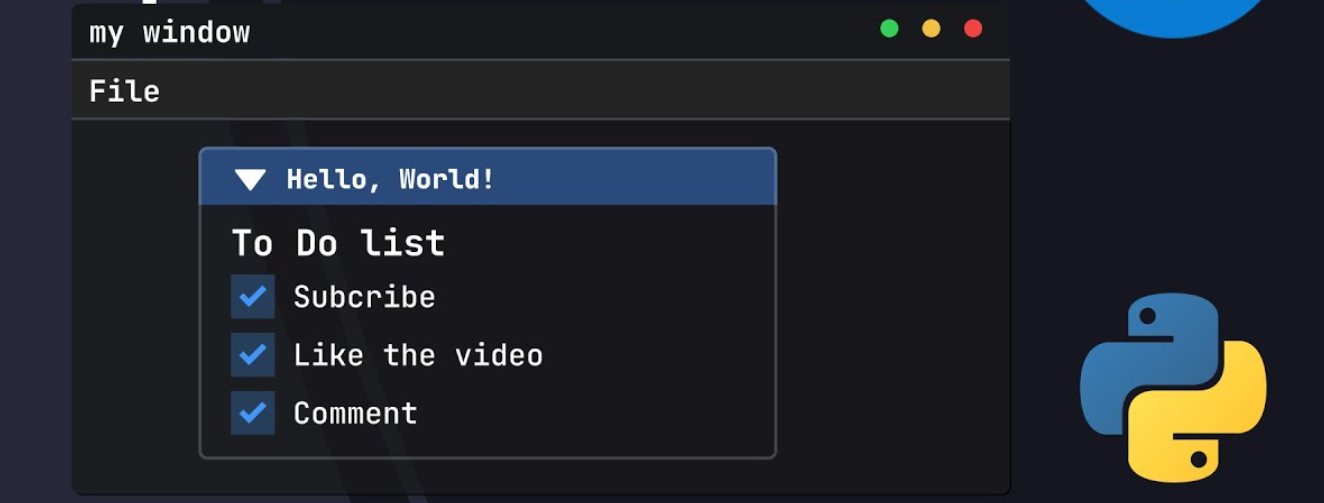
with dpg.window(label="tree", width=500, height=500):
        with dpg.collapsing_header(label="Tree root"):
            with dpg.tree_node(label="tree node 1"):
                dpg.add_text("Hello, world")
            with dpg.tree_node(label="tree node 2"):
                dpg.add_text("Hello, world2 ? iguess")
                with dpg.tree_node(label="tree node node"):
                    dpg.add_text("Hello, world3 ? iguess")

网站式布局 demo
这里有一个官方demo中的布局可以参考:
with dpg.window(label='hello_world', width=600, height=400,pos=(0, 0)):
    with dpg.child_window(width=500, height=320, menubar=True):
        with dpg.menu_bar():
            dpg.add_menu(label="Menu Options")
        with dpg.child_window(autosize_x=True, height=95):
            with dpg.group(horizontal=True):
                dpg.add_button(label="Header 1", width=75, height=75)
                dpg.add_button(label="Header 2", width=75, height=75)
                dpg.add_button(label="Header 3", width=75, height=75)
        with dpg.child_window(autosize_x=True, height=175):
            with dpg.group(horizontal=True, width=0):
                with dpg.child_window(width=102, height=150):
                    with dpg.tree_node(label="Nav 1"):
                        dpg.add_button(label="Button 1")
                    with dpg.tree_node(label="Nav 2"):
                        dpg.add_button(label="Button 2")
                    with dpg.tree_node(label="Nav 3"):
                        dpg.add_button(label="Button 3")
                with dpg.child_window(width=300, height=150):
                    dpg.add_button(label="Button 1")
                    dpg.add_button(label="Button 2")
                    dpg.add_button(label="Button 3")
                with dpg.child_window(width=50, height=150):
                    dpg.add_button(label="B1", width=25, height=25)
                    dpg.add_button(label="B2", width=25, height=25)
                    dpg.add_button(label="B3", width=25, height=25)
        with dpg.group(horizontal=True):
            dpg.add_button(label="Footer 1", width=175)
            dpg.add_text("Footer 2")
            dpg.add_button(label="Footer 3", width=175)
多文件
如果写了很多窗口,都放在一个文件可能会很乱,可以通过多文件来实现
从 main 中启动放在 win2 的窗体
main.py
from win2 import *

dpg.create_viewport(title='DearPyGui Test', width=800, height=400)
with dpg.window(label='window1', width=300, height=300, pos=(20, 20), tag='win1'):
    dpg.add_button(label='open win2', tag='button',callback=show)
win2.py
import dearpygui.dearpygui as dpg
def show():
	# 为了防止重复id,需要先检查并销毁win2
    if dpg.does_item_exist(item='win2'):
        dpg.delete_item(item='win2')
    with dpg.window(label = 'popup' , width=300, height=300, pos=(340, 20) , tag='win2'):
        dpg.add_text('this is a popup')
使用中文
像数字体推荐:https://font.chinaz.com/23082230177.htm
这段代码位置放到创建窗体上面、 create_viewport 下面
SIMSUN.TTC 在 windows C:\Windows\Fonts 文件夹下自带
with dpg.font_registry():
    with dpg.font("SIMSUN.TTC", 14) as font1:  # 增加中文编码范围,数字是字号,会比官方字体模糊
        dpg.add_font_range_hint(dpg.mvFontRangeHint_Default)
        dpg.add_font_range_hint(dpg.mvFontRangeHint_Chinese_Simplified_Common)
        dpg.add_font_range_hint(dpg.mvFontRangeHint_Chinese_Full)
    dpg.bind_font(font1)
timer
这是一个奇怪的实现方法,绑定在了 render loop 上 https://dearpygui.readthedocs.io/en/latest/documentation/render-loop.html
# below replaces, start_dearpygui()
while dpg.is_dearpygui_running():
    print("this will run every frame")
    dpg.render_dearpygui_frame()
